|
I decided to make a series of videos
showing a very common drywall repair from beginning to end, with my kids doing the repair! These
videos show the steps quite nicely and also illustrate that DIY
drywall repair, taping, and finishing is something that even a 12 year
old can learn to do, with a bit of instruction (and patience). It
worked out well in that I could verbally provide helpful instructions
as the kids did the work - this would have been more difficult to do
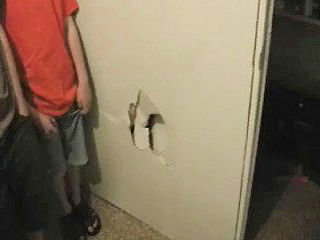
if I were doing the work myself. The hole we repaired is shown
on the right. Note that many of the photos on this page are video
stills.
|

Click On Photo To Enlarge |
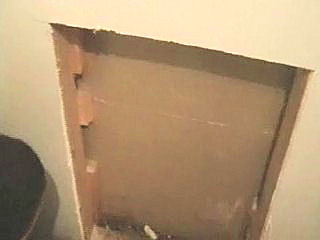
Step 1 -
Cut Out Damaged Area - Mark and cut out the damaged area. For a
large hole like this, you will want to remove a section of drywall up
to each surrounding wall stud. A quicker
repair for a small hole is
shown here. The kids locate the studs with a stud finder, use a
hammer and nail to probe around to find the exact location of the stud
edge, and then mark lines where they will cut. Then they carefully cut
out a square that contains the hole with a utility knife (keep this
cut out portion as a pattern!). Don't use a
drywall saw, as you may accidentally cut into an electrical wire!
Note that you will cut flush with the studs. In the next step, they
will fasten two-by-two pieces to the sides of the studs to serve as
nailers for the patch piece.
 Watch Quicktime Video or Windows Video or click on the video on the right.
|

Click On Photo To Enlarge
|
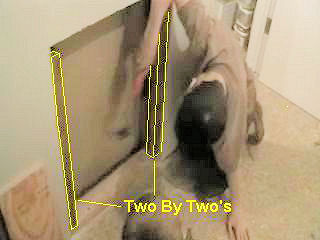
Step 2 -
Attach Nailers - Along the sides, attach 2x2 blocking to the studs
so the patch piece will lie level with the existing drywall. Also,
attach plywood behind the top horizontal edge. The patch piece
will then attach to the nailers and the plywood. Also, in this step,
remove any drywall nails or screws from the bottom wall plate/stud.
Watch Quicktime Video or Windows Video or click on the video on the right.

Click On Photo To Enlarge
|

Click On Photo To Enlarge
|
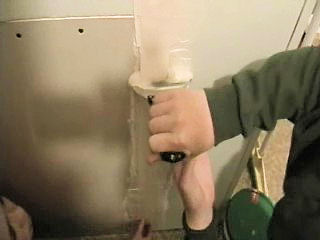
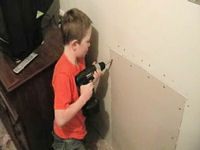
Step 3 -
Cut Out and Attach Patch Piece - Using your cut out damaged piece
as a pattern, mark out your patch piece. Cut out the patch piece by
scoring on the finished side, pushing at the back to fold the pieces,
and then cutting from the back side. Fasten the drywall patch piece to
the plywood and 2x2 nailers you installed in Step 2. Note: On many
older homes, 3/8" drywall was used instead of 1/2" drywall - you need
to match the thickness of your patch piece with your existing wall.
Watch Quicktime Video or Windows Video or click on the video on the right. |
Click On Photo To Enlarge
|
Step 4 -
Apply Tape To Joints - For a
small hole in the middle
of a wall, taping is not needed, but in this case, since the repair is
along a joint, taping is required since a crack will form due to
stress along the joint. The boys precut pieces of paper drywall tape,
liberally apply joint compound at a width just a little wider than the
tape, quickly pass the paper tape through a bucket of water, place it
on the joint, and then imbed it with a 4.5" knife. The knife should be
held at about a 45 degree angle and enough pressure should be placed
so the excess compound is forced out the sides of the tape, as shown
on the video.
Watch Quicktime Video or Windows Video or click on the video on the right. |

Click On Photo To Enlarge
|
|
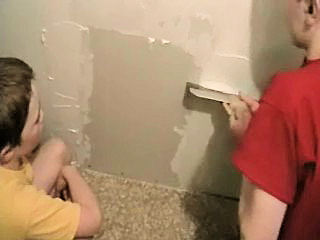
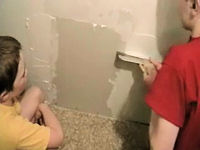
Step 5 - Overcoat Tape - After the compound from the previous step
is thoroughly dry, use taping knives to knock off any bumps, chunks,
or ridges of compound. You need a level surface before applying
any new coats!
Place a liberal coat of joint compound about 6" wide
over the taped joints and then immediately skim it off level with a
wide taping knife. Hold the knife at about a 45 degree angle and apply
uniform light pressure to produce a light level coat. It is helpful to
slightly thin your compound by dipping your taping knife in some water
and mixing what is on the knife into the compound. Also, dip you
knife in water before you skim.
Watch Quicktime Video or Windows Video or click on the video on the right.
|
Click On Photo To Enlarge
|
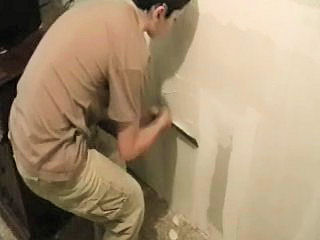
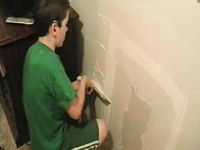
| Step 6 -
Place Two Side Coats - As always, before applying any coats,
scrape and knock down the thoroughly dried surface with taping knives
to get rid of bumps and ridges and provide a level surface.
Since this is a
butt joint, we will be
placing side coats on each side of the tape. This will be followed in
the next step with a coat down the middle. The side coats build
up the surface so that the middle coat can completely cover the tape.
Each side coat is about 6-8" wide and is located on each side of the
paper tape underneath. Application and skimming is similar to the
overcoat placed on in Step 5.
Watch Quicktime Video or Windows Video or click on the video on the right.
|
Click On Photo To Enlarge
|
| Step 7 -
Apply Middle Coat - After the previous coats are dry, use your
taping knife to scrape off any compound sticking up and level any
ridges. For washboard type ridges, firmly apply pressure using both
hands on a taping knife, and scrape perpendicular to the ridges.
Apply a 6-8" wide coat of compound in between the two
previous coats, overlapping these coats a bit. This coat will, if you
are lucky, completely cover the paper tape.
Watch Quicktime Video or Windows Video or click on the video on the right. |

Click On Photo To Enlarge
|
Step 8 -
Repeat Steps 6 and 7 if needed - Sometimes, you can cover the tape
completely with Steps 6 and 7. If this is the case, proceed to Step 9.
And sometimes you must add more coats. In our case, the tape was still
just barely sticking up in a few places. So we had to repeat steps 6
and 7 by applying two outside coats, followed by a middle coat down
the middle. This resulted in a slightly wider taped region, with the
tape completely covered.
Watch Quicktime Video or Windows Video or click on the video on the right. |

Click On Photo To Enlarge
|
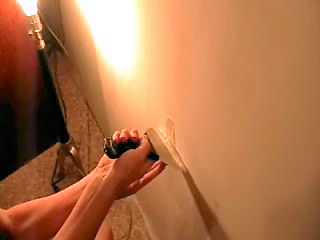
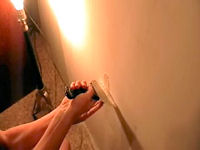
| Step 9 -
Touch Up Work - Use a trouble light, or simply a household lamp
with the shade removed to help find ridges and bumps. Scrape down the
surface with taping knives held firmly with two hands. The light will
help you spot "washboard ridges" - scrape these down scraping
perpendicular to the ridges. Get the surface as level as possible.
Apply small amounts of thinned out compound to any drag
marks or other depressions and then skim off with your taping knife.
Here, you don't want to apply a coat but rather fill depressions.
Also, if the edge of you coat is not feathered out completely, you can
apply a very light narrow coat to feather this out if needed. Use the
lamp or trouble light as your guide to see what needs to be filled.
Ideally, you should almost be ready to paint after doing this with no
sanding at all. But we will sand very lightly just to finish this off
in the next step.
Watch Quicktime Video or Windows Video or click on the video on the right.
|
Click On Photo To Enlarge
|
| Step 10 -
Sand, Prime, and Paint - Quickly go over the surface scraping any
small bumps off if needed, although there should not be many from the
touch up work you did. Sand very
lightly with 200 grit paper on a 3.5" by 8" block of 2x4. Use a
circular random motion and strive to only dress the surface rather
than take much compound off. Too much sanding can quickly expose the
paper tape! Dust off or vacuum off this surface before priming.
Prime with an interior latex primer suitable
for new drywall - virtually all are. Use a roller and apply paint with
random patterns. Do not work the roller too long in one spot as it can
possibly loosen the compound.
Paint with a matching latex paint. Sometimes,
to get an exact match, you will need to paint all the way to the
nearest corner. Apply a second coat if needed.
A photo and a video still of the finished wall is
shown on the right.
Watch Quicktime Video or Windows Video or click on the video on the right.
Show this page and videos to your
kids so they know what to do when they bust a hole in your drywall! :)
|
|