|
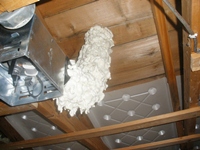
We found ourselves constantly cleaning black mold off our bathroom ceiling and walls during spring and fall months when moisture levels were high in the house yet outside temperatures were below freezing. The photo on the right show mold that appeared less than a month after wiping down the ceiling and walls with straight bleach!
The mold was forming due to moisture collecting on the cold ceiling and wall. And the ceiling and wall were not insulated good enough due to simply not enough space for insulation. The solution consisted of removing the drywall, replacing insulation, and bringing the ceiling down 2" and the wall in 2" to allow for more insulation.
Before doing anything, visit this summary of mold solutions to see what solution is best for you. Solution 1 is documented on this page.
. |

Click On Photo To Enlarge |
Step 1 -
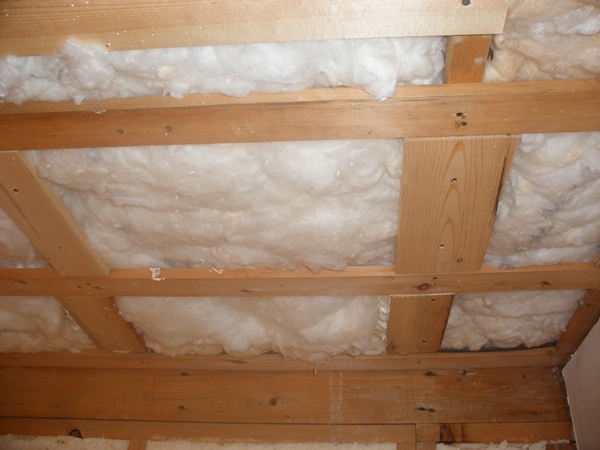
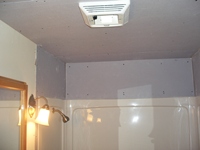
Remove Ceiling and Exterior Drywall and Attic Insulation and Clean The Surfaces - If you have mold forming, it is a good bet that your insulation above is also compromised. You should remove all insulation in your attic above the ceiling you removed. In our case, I knew the insulation was needing removal as the fan installed by the previous owners had a vent pipe that popped off and thus the fan was blowing damp air into the insulation. (Never use the cheap plastic clamp/tie supplied with a bathroom fan - use a sturdy metal hose clamp!) Clean the rafters or trusses off with a strong bleach solution.
|

Click On Photo To Enlarge |
Step 2 -
Insulate Your Attic Space - I installed insulation chutes to maximize the amount of insulation yet maintain air flow from the eaves to the peak of the roof. I used expanding foam to seal cracks and fiberglass batts in the attic, installing them from below. Having the ceiling open makes it a lot easier to properly insulate this tight attic space. If you can afford, hire someone to professionally install expanding foam in your attic.
Insulate well around your bathroom fan (you really need one!). I covered my vent pipe with expanding foam, a trick I learned from a professional handyman.
Click On Photo To Enlarge
|


Click On Photo To Enlarge
|
Step 3 -
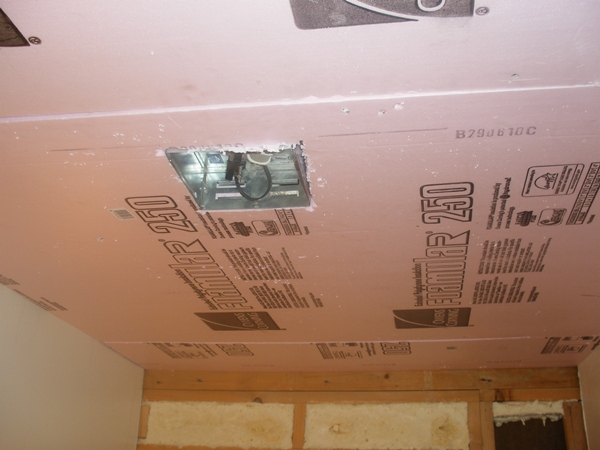
Attach 1" or 2" Dense Foam Insulation To Ceiling - I chose to put up 2" of foam due to our severe mold problem. I used long drywall screws to keep the foam in place and sealed up any gaps or cracks with caulk and expanding foam.
I installed drywall over the top of the foam using 4" drywall screws. I used more screws than I typically would to insure the drywall was firmly attached. |

Click On Photo To Enlarge
|
| Step 4 -
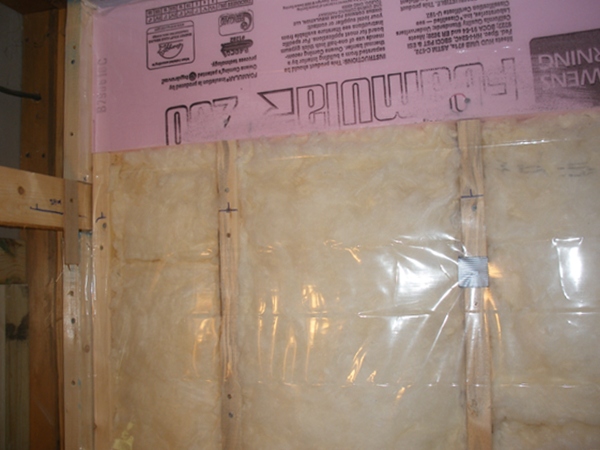
Increase The R-value of Your Exterior Wall To Accomodate More Insulation - There are different ways of doing this - see bathroom exterior wall options. I chose to bring in my wall 2" by attaching 2x2 nailers. Also, I replaced my tub and shower since my tub had some cracks (big job!). If I chose an option leaving my shower in place, I would have a 4" exterior wall for most of the wall - this also played into my decision. There are more details on converting a 4" wall to 6" at this site. In our home, over 80% of our exterior walls have been converted to 6". The photo on the right shows the nailers I put in. |

Click On Photo To Enlarge
|
| Step 5 -
Apply Vapor Barrier To Your Wall If Needed - If you are using fiberglass batts, install a vapor barrier over the top of the insulation. If you are insulating with expanding foam then this vapor barrier is not needed. Also, a barrier is not needed for the ceiling if you are covering it with dense foam. |

Click On Photo To Enlarge |
| Step 6 -
Install New Tub or Shower - If you go this route, plan on using an alternate shower for a few weeks. See These Pages for help with the plumbing. It's a bigger job than you might guess since if you move the wall, all the plumbing needs to be moved as well, among other things. |
|
Step 7 - Install New Drywall - I fastened the ceiling drywall on first using mold resistant drywall. This allowed me to butt the wall drywall up under it and support it at the edges. As stated earlier, I used some 4" screws fairly liberally to fasten the ceiling drywall through the 2" foam. The dense foam will prevent any cold spots that sometimes occur along the sides of trusses or rafters where a cold draft can sneak down. And cold spots lead to dampness, which leads to mold.
Note that NO drywall is water proof so any surfaces exposed to water routinely should consist of a water proof substance like tile over tile backer board. Wet drywall near your tub will eventually attract mold. |
Click On Photo To Enlarge
|
Step 8 -
Finish The Drywall - Tape all joints that need to be taped and finish the drywall. For the inside corners, see this taping inside corners tutorial. For other joints see this taping drywall joints tutorial. If you take your time, you can have a drywall surface that does not need to be textured. In fact, if it is done carefully enough, you can even paint with a semi-gloss, even the ceilings. |

Click On Photo To Enlarge
|
Step 9 -
Prime and Paint - After priming the walls and ceiling, you should caulk around your tub if you installed a new tub. I used Zinnser Mold Resistant primer followed by Perma White Mold Proof Paint. I have been told that the mold proof paint alone will prevent a lot of mold. However, with only the paint, I would still have cold spots on my ceiling and walls collecting excessive moisture. My chosen solution not only will prevent mold, it will decrease condensation and save on my heating bill. |

Click On Photo To Enlarge
|